2. Using Intel® HLS Compiler Pro Edition with an Eclipse* IDE on Linux Operating Systems
Before you use the Intel® HLS Compiler Pro Edition Version 20.1 with an Eclipse* IDE, ensure that you have complete the following tasks:
- Install the Intel® HLS Compiler Pro Edition.
For information about installing the Intel® HLS Compiler, see Intel® High Level Synthesis Compiler Pro Edition Getting Started Guide .
- Install an Eclipse IDE and the Eclipse C/C++ Development Tooling (CDT)
To use the Intel® HLS Compiler Pro Edition with an Eclipse* IDE, start a terminal session and complete the following steps in that terminal session:
- Create and configure an Eclipse* project for your HLS component:
- Select a C++ Managed Build template for the project and select the following properties:
- Project type:
- Toolchains: Linux GCC

- Set the C++ dialect and libraries call properties for the project:
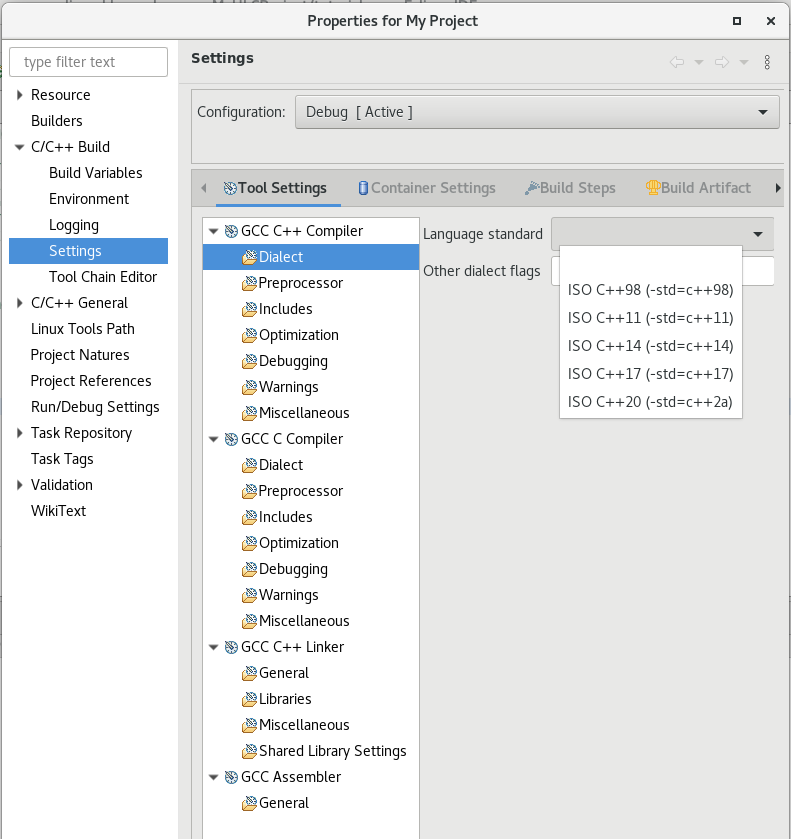
- On the Tool Settings tab, go to and set the Language standard value to ISO C++17 (-std=c++17).
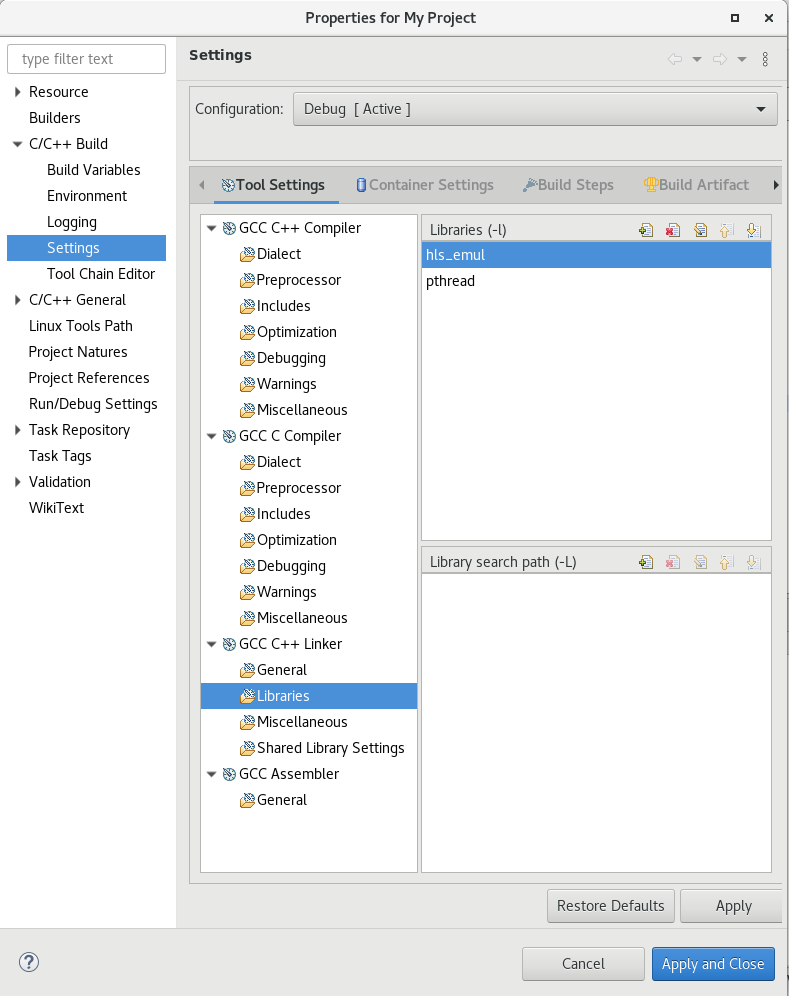
- On the Tool Settings tab, go to and add the hls_emul and pthreadlibraries to the list of libraries.
- On the Tool Settings tab, go to and set the Language standard value to ISO C++17 (-std=c++17).
- Select a C++ Managed Build template for the project and select the following properties:
You can now develop, run, and debug your HLS component using your Eclipse* IDE.
After you have confirmed the functional correctness of your component, you can start to optimize your HLS component by using the information in the Intel® HLS Compiler High-Level Design Reports. These reports are generated when you compile your component with the i++ command.
You can also use your Eclipse* IDE to debug executable files that are produced by compiling your component with the i++ command