Visible to Intel only — GUID: nik1412546874161
Ixiasoft
5.1. Understanding the Design Steps for CvP Initialization Mode
5.2. Understanding the Design Steps for CvP Initialization Mode with the Revision Design Flow
5.3. Understanding the Design Steps for CvP Update Mode
5.4. Bringing Up the Hardware
5.5. CvP Debugging Check List
5.6. Known Issues and Solutions
5.2.1. Downloading and Generating the High Performance Reference Design
5.2.2. Workaround for a Known Issue with Transceiver Reconfiguration Controller IP Core
5.2.3. Creating an Alternate user_led.v File for the Reconfigurable Core Region
5.2.4. Setting up CvP Parameters for CvP Initialization Mode
5.2.5. Creating CvP Revisions of the Core Logic Region Using the CvP Revision Design Flow
5.2.6. Compiling both the Base and cvp_app Revisions in the CvP Revision Design Flow
5.2.7. Splitting the SOF File for the CvP Initialization Mode with the CvP Revision Design Flow
5.3.1. Downloading and Generating the High Performance Reference Design
5.3.2. Workaround for a Known Issue with Transceiver Reconfiguration Controller IP Core
5.3.3. Creating an Alternate user_led.v File for the Reconfigurable Core Region
5.3.4. Setting up CvP Parameters for CvP Update Mode
5.3.5. Creating CvP Revisions of the Core Logic Region Using the CvP Revision Design Flow
5.3.6. Compiling the Design for the CvP Update Mode
5.3.7. Splitting the SOF File for the CvP Update Design Mode
5.3.8. Splitting the SOF File for the CvP Update Mode with the CvP Revision Design Flow
6.3.1. Altera-defined Vendor Specific Capability Header Register
6.3.2. Altera-defined Vendor Specific Header Register
6.3.3. Altera Marker Register
6.3.4. CvP Status Register
6.3.5. CvP Mode Control Register
6.3.6. CvP Data Registers
6.3.7. CvP Programming Control Register
6.3.8. Uncorrectable Internal Error Status Register
6.3.9. Uncorrectable Internal Error Mask Register
6.3.10. Correctable Internal Error Status Register
6.3.11. Correctable Internal Error Mask Register
Visible to Intel only — GUID: nik1412546874161
Ixiasoft
5.3.4. Setting up CvP Parameters for CvP Update Mode
Follow these steps to specify CvP parameters using the Quartus Prime software:
- On the Assignments menu, select Device, and then click Device and Pin Options.
- Under Category first select General, and then enable following options:
- Auto-restart configuration after error. If this option is enabled, CvP restarts after an error is detected.
- Enable autonomous PCIe HIP mode.
Checking this box has no affect if you have enabled CvP by turning on Enable Configuration via the PCIe link in the Hard IP for PCI Express GUI, hence Altera recommends to keep it unchecked.
- Leave all other options disabled.
Figure 40. Device and Pin Options Window
- Under Category select Configuration to specify the configuration scheme and device. Specify the settings in the following table:
Table 19. CvP Update Mode Configuration Settings Parameter
Value
Configuration scheme
Passive Serial
Configuration mode
Standard
Configuration device
Auto
Configuration device I/O voltage
Auto
Force VCCIO to be compatible with configuration I/O voltage
Leave this option off.
Generate compressed bitstreams
Leave this option on.
Active serial clock source
100 MHz Internal Oscillator
Enable input tri-state on active configuration pins in user mode
Leave this option off.
Figure 41. Configuration Window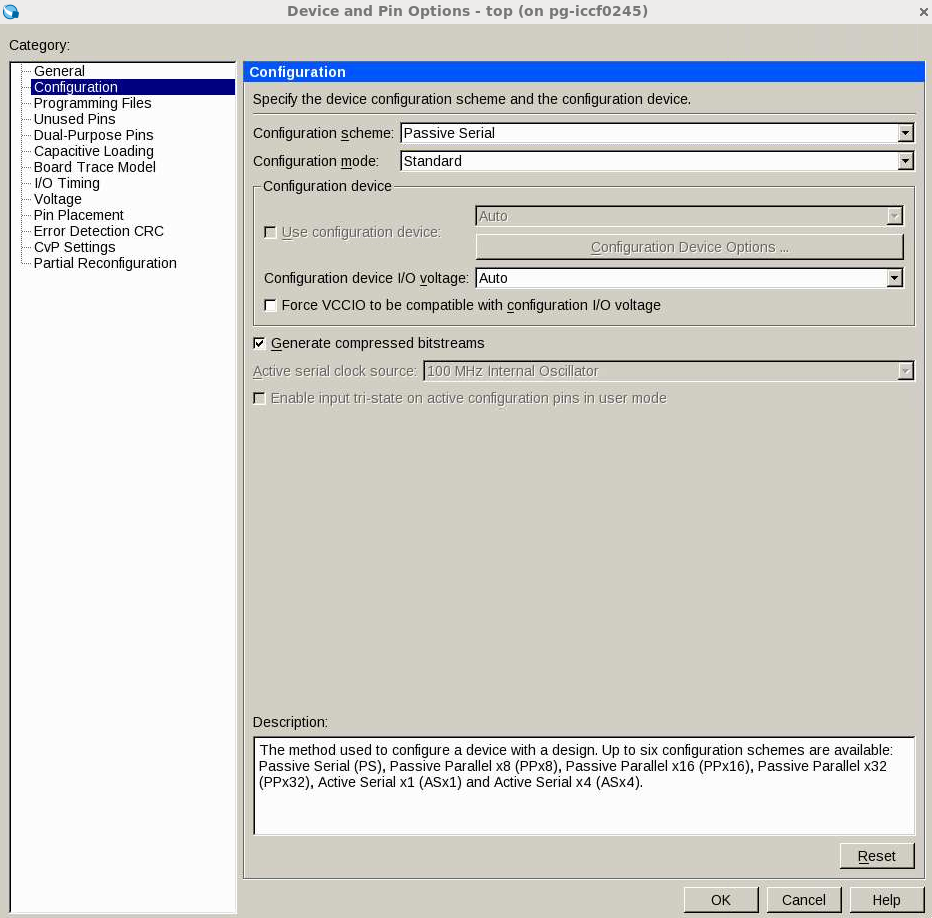
- Under Category select CvP Settings. Specify the settings in the following table:
Table 20. CvP Update Category Settings Parameter
Value
CvP via Protocol
Core update
Enable CvP_CONFDONE pin
Turn this option on.
Enable open drain on CvP_CONFDONE pin
Turn this option on.
Figure 42. CvP Settings Window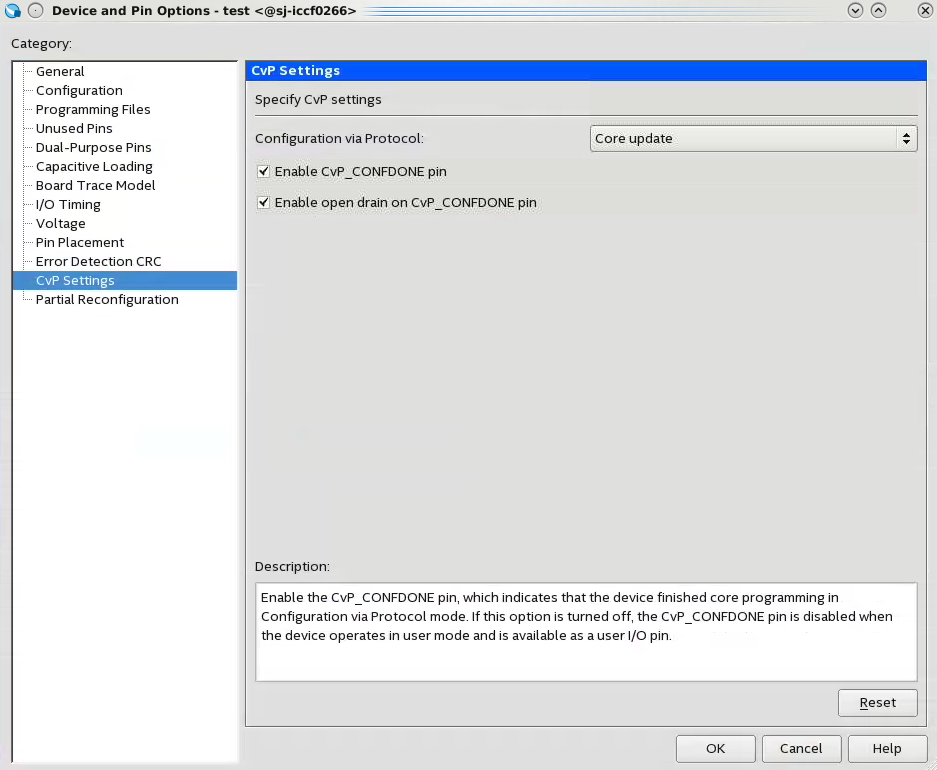
- Click OK to close the Device and Pin Options dialog box.
- Click OK to close the Device dialog box.
- Save your project.